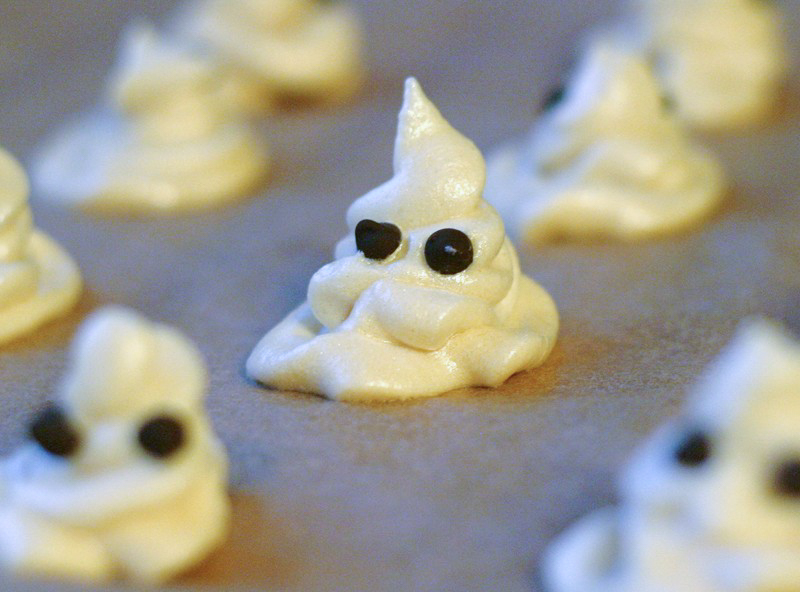
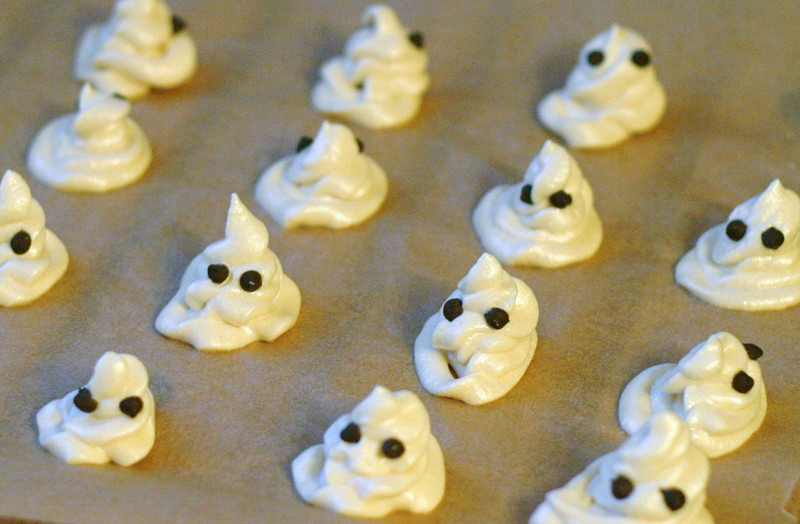
We're rapidly approaching the season of sweets. It starts this Saturday (in the U.S.) with Halloween, and doesn't end until some time in early spring. I'm not sure what I'm giving out to trick-or-treaters, although we don't get too many of them because we're not in a development-type neighborhood, which are very popular around the Seattle suburbs. Instead, we're on a dark, quiet street, with a long, dark driveway surrounded by woods on either side. It's great for lining with candle-lit pumpkins and makes for a slightly creepy experience.
While this recipe seems somewhat tricky to pull off, it wasn't. I use either a dehydrator, or the oven. My dehydrator only reaches a high of 190 degrees F, so that's the setting I use and the ghosts do fine.
Depending on your climate on how long you dried these, they will stay crunchy for a few hours or a few days.You can re-dry them in the oven or dehydrator, or seal them in a container of some kind when they're cooled to room temperature to get or keep them crunchy. They're fun in any case.
One thing I didn't do is dip the bottom of each ghost in chocolate, which might help when picking if they get a bit sticky.
If you're following SCD, use just honey, egg whites, lemon juice, and salt.
If you're feeling really adventurous, you could add cocoa or vanilla to the meringue batter while whipping it. It's on my list of things to try. I've also used natural yellow and red food dyes to make them orange.I added the food dye to the egg whites before I started to whip them.
Boo!
Marshmallows Ghosts
Equipment
- Mixer with a whipping attachment
Ingredients
- ½ cup honey
- 2 large egg whites
- ¼ teaspoon lemon juice or vinegar; or a pinch of cream of tartar
- Ghostly eyes chocolate chips, currants, raisins
Instructions
- Prepare two baking sheets with parchment paper, or non-stick mats. Also prepare a pastry bag, or a plastic freezer bag with one of the ends cut slightly to let a small amount of meringue out when you squeeze it to shape the meringues.
- Add the honey to a saucepan and boil it somewhat vigorously until it starts to turn brown (or about 250 degrees F). It should form a ball when place a drop of the honey in cold water. Let it cool but keep it somewhat runny so you can pour it into the egg whites.
- Place the egg whites in a dry, clean mixing bowl. Begin whipping the egg whites using the whipping attachment for your mixer. Once they become frothy (after a few minutes), add the salt and cream of tartar (or lemon juice), and continue whipping the egg whites until they start to get glossy. I use a Kitchen Aid mixer with the whip attachment, but you could use a hand beater. Keep the egg whites whipping all the time.
- When the egg whites start to get slightly glossy, slowly drizzle the honey into the egg whites while you continue to whip them. The honey may spray a bit – to avoid this I drip the honey almost down the side of the bowl. Continue whipping them to maintain their peaks - about 5 more minutes. They should be very light and fluffy at this point. Keep an eye on them. If they've turned to liquid you've gone too far.
- Transfer the meringue mixture to the pastry bag or plastic bag.
- Preheat an oven or dehydrator to 200 degrees F.
- Holding the bag of meringue mixture, squeeze the bag in small circles to form the ghosts (on the parchment paper or non-stick surface). Don’t worry if they’re not perfect – they can pass as ghosts or mummies.
- Add eyes now or when they come out of the oven – either way works because they are still slightly sticky when they’re finished drying (and before they cool). If you're adding chocolate, they may sweat a bit.
- Place the meringues in the oven for 1 to 1 ½ hours, or until they are dry to the touch. Once they cool for a few minutes you can test them to see if they’re crunchy (you may have to taste one). If they’re not crunchy after this point, keep them in the oven or dehydrator longer. Since you’re not using powdered sugar (which gets them crunchier faster), you may have to leave them in a warm oven for a few hours.
- Store them in a dry place for a few days. Re-dry as necessary.
- Happy Halloween!


Nicole says
I'm so excited to have an SCD Halloween treat! I've been missing all of the fun holiday baking since starting the diet. Thanks for sharing 🙂
Michelle says
Ok, So my daughter wanted to try again to see if she could get the meringues to stay up and she whipped again until the batter seemed thick again, cause after adding honey it went flat, honey which she did not heat since it was not raw ( I figured there is no point using better, more expensive, raw honey for baking, since heating probably kills the good enzymes, vitamins... so I save for smoothies, dipping, putting on salmon after its out of oven...) AND.... they did turn out puffy and tall like in your picture, very cute and delicious, BUT after two days of stuffing our faces with yummy meringue cookies I told her we had to take a break and try some other recipes..... Just wanted to update you. Thanks again for all of your inspiration...I want to try your candied apples next and finally found popsicle sticks and have lots of yummy organic apples I just bought at Trader Joes...sooooo
Erica says
Yeah! Yes, you do want to boil the honey, as you found out. I agree, I wouldn't use expensive honey for project :). Good luck with the apples. The caramel can be a bit finicky as well.
Ann says
I tried to make these, and just like michelle they turned out flatter, and chewier, not like the meringues you get in stores. I wipped them well, added the honey, then it seemed like all of the wipping i did just went away. During step number 4, do you add the honey then start making the meringues, or do you add the honey then whip them again? Also is it nesecary to heat, and re-cool the honey if the honey is not raw?
Erica says
Hi Ann. I just updated the steps that you asked about. I did end up whipping them for quite a while, so I added on to the whipping time. I do whip the meringues a bit longer after all the honey is added, but not much longer. Just enough to keep them fluffy. Hope that works. Let me know if you have success or have more questions.
Michelle says
My daughter, age 13, and 2 friends made these for Halloween yesterday afternoon and they were delicious and cute. They turned out more flat and I was out so did not supervise,(not that I would have been allowed in kitchen anyway) but they were still a winner. Thanks for the timely, fun recipes for our household. Everyone enjoyed making and eating these.
Erica says
Ah - yes, they might not have been whipped enough if they were flat. I love that the kids are cooking/baking!
Sophie says
Your ghostly meringues look just stunning! fabulously food!
hobby baker says
Yum! I love meringues and I'll bet my girls would adore these little guys.
Tracey says
Yum! I'd take my girls to your house for trick-or-treating!