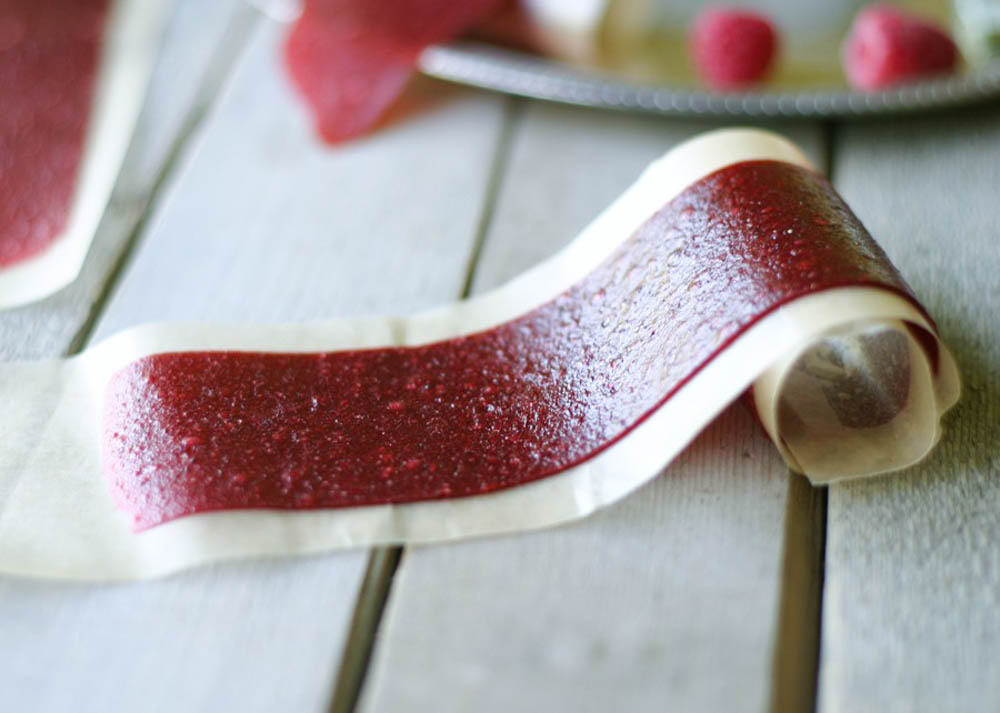
Fruit leather packs a sweet, tarty chew that's ready at a moment's notice. I used strawberries and raspberries for this fruit leather recipe, but you have a lot of options.
You can use just about any kind of berry to make this fruit leather. Some fruits and berries work better than others on their own, however combining fruits in a fruit leather can bring the best of flavors and textures together, and create a new flavors.
In general, apple, apricots, berries with seeds, cherries, peaches, pears, nectarines, pineapple, and strawberries work well on their own as fruit leather. Blueberries are best combined with another fruit that works well, and the same goes for bananas, cranberries, grapes, and plums. But don't let me hold you back. Explore. Especially if you have extra ripened fruit, or frozen fruit you've had around for a while.
You'll want to take any pits out of the fruit before you start. For seeds, as in raspberries, I blend once, separate out the seeds, and then add any additions and blend again.
You can dry the fruit leather in a dehydrator, or an oven set at a low temperature (between 105°F/40°C and 120°F/50°C is good for about 8-10 hours, depending on your dehydrator or oven).
There seems to be some controversy about what is the best temperature to dry fruit leather so as not to denature the enzymes in the fruit. If you're not worried about that, you can dry the fruit at up to 140°F/60°C, however I keep the temperature at about 105°F/40°C because I do want to retain as much of the fruit's natural state (enzymes intact). I have an Excalibur dehydrator, so I found this post helpful in explaining how the temperature setting works for this brand. I've also found that 105°F/40°C for about 10 hours works well for fruit leather. And it's really easy to place it in the oven or dehydrator overnight and then pull it out in the morning. To speed up the drying process, just increase the temperature.
Whether you're using a dehydrator or an oven, you'll want to make sure your fruit is on top of a non-stick surface. You can use parchment paper, a non-stick bake mat, or the non-stick sheets that come with your dehydrator. And if you want to conserve energy, you can leave the fruit outside on a hot day, tented with cheesecloth or paper towel.
Some other nice additions to the recipe might be some vanilla, cinnamon, lavender, lemon zest, rosemary, or other spices and herbs. You can also add a bit of lemon juice if you're concerned about the fruit darkening too much (especially with apples and pears).


Berry Fruit Roll-Ups
Ingredients
- 1 pound strawberries washed and tops cut off
- 1 pound raspberries washed
- 2 tablespoons honey or a bit more, depending on the sweeteness of the berries
Instructions
- Using a high-speed blender or food processor, blend the berries until you have a smooth, thick liquid.
- Using a thin-mesh strainer or other kind of seive (or food mill), separate the leftover seeds by running the thick liquid through the strainer.
- Place the thick fruity liquid back in the blender and add honey to sweeten it. Add sweetener slowly and taste to see if it's as sweet enough for you.
- Pour about 1 cup of liquid onto a non-stick surface on top of dehydrator tray, or cookie sheet (if you're using an oven).
- Tilt the tray to spread the fruit liquid around until it is about ⅛ inch or so in thickness. Make it the thickness that you prefer. It does shrink in thickness as it dries.
- Place the fruit into the dehydrator for between 8-10 hours at about 105°F/40°C or a bit higher if you prefer to speed up the process. If you're using an oven, try to set the temperature below 140°F/60°C.
- finished, peel the fruit leather from the surface and store sealed at room temperature. I roll the fruit leather strips in wax paper; it's the reverse of what you see in the photos (one sheet of wax paper, the same length as the fruit leather strip; lay the fruit leather on the wax paper and then roll the wax paper so that it rolls up and covers the fruit leather).


GutsyGirly says
Grease fruit rollups are awesome! I am looking forward to trying them out!!
Gutsy girly says
*great (sorry)
Erica says
thanks! they are a classic 🙂
Lindsay says
Love, love, LOVE!
Erica says
thanks 🙂
Roxy says
Hi. I LOVE your website!!! I have tried fruit roll ups before. and didnt work out so well but I never sieved out the seeds.
Now I am trying them again. I own a new digital stove but the lowest temperature is 170. So ANNOYING!
And my dehydrater doesn't have any attachments for something liguid in it. {It has slotted trays).
I looked into the price of attachments but it would cost me another home!!! LOL
So now as we speak I am trying again at 170 in the oven but seeds sieved out and on a baking mat this time.
I will let you know how it works out!!
Erica says
Try placing parchment paper over the trays. Good luck!
Jennifer says
Try leaving your oven door open a crack; that's how my husband made jerky with our stove that only went down to 210F.
Nicole B says
If using other fruits, would you just simply use 2 lbs.?
Erica says
Yes, that will work. This is a very forgiving recipe - no need for exact weight, however the sweetness may vary, so adjust it according to your taste and the sweetness of the fruit you're using.
Pam@behealthybehappywellness says
I'll be trying these today! Thanks as always for sharing - I'm always up for new portable snacks for my kids!
Yuki says
These look delicious. If stored at room temperature how long do they last? Can they be frozen?
Erica says
I only keep them at room temperature if I know they'll be eaten in the next day or so, so I'm not sure how long they will last. If they'll be hanging around longer I refrigerate them. I think freezing would work, just seal them well.
Justine says
why do I get the feeling that my fruit roll ups aren't going to look anywhere NEAR as beautiful as yours?? Can't wait to try!
Erica says
oh, they will. It was quite easy. I cut them with kitchen scissors for even strips.
Caralyn @ glutenfreehappytummy says
Wow! these bring me right back to my brown bag lunch days at school! they look delicious! thanks for the recipe!