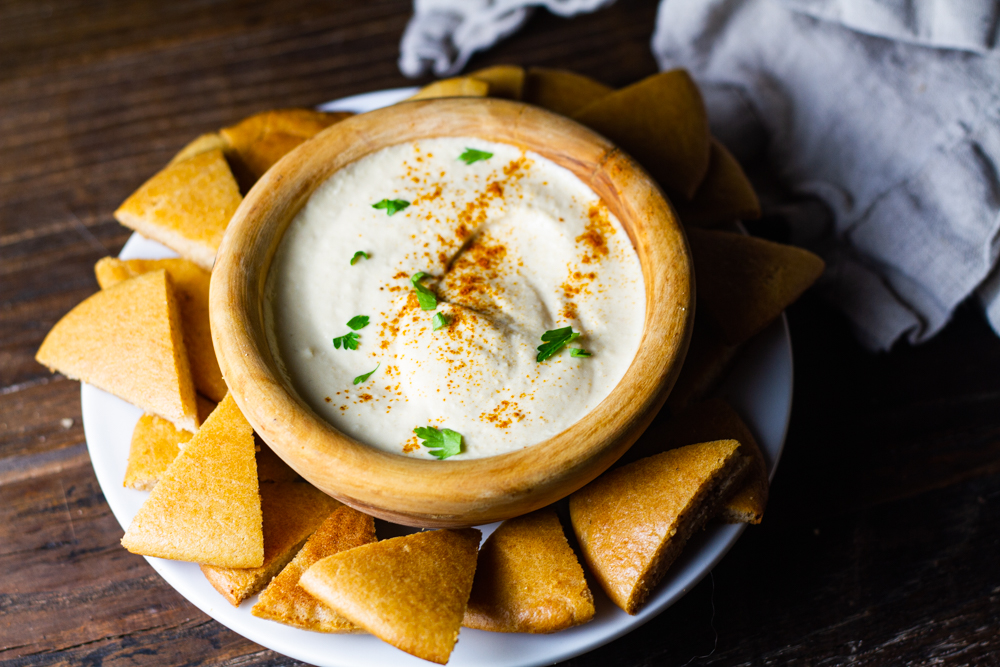
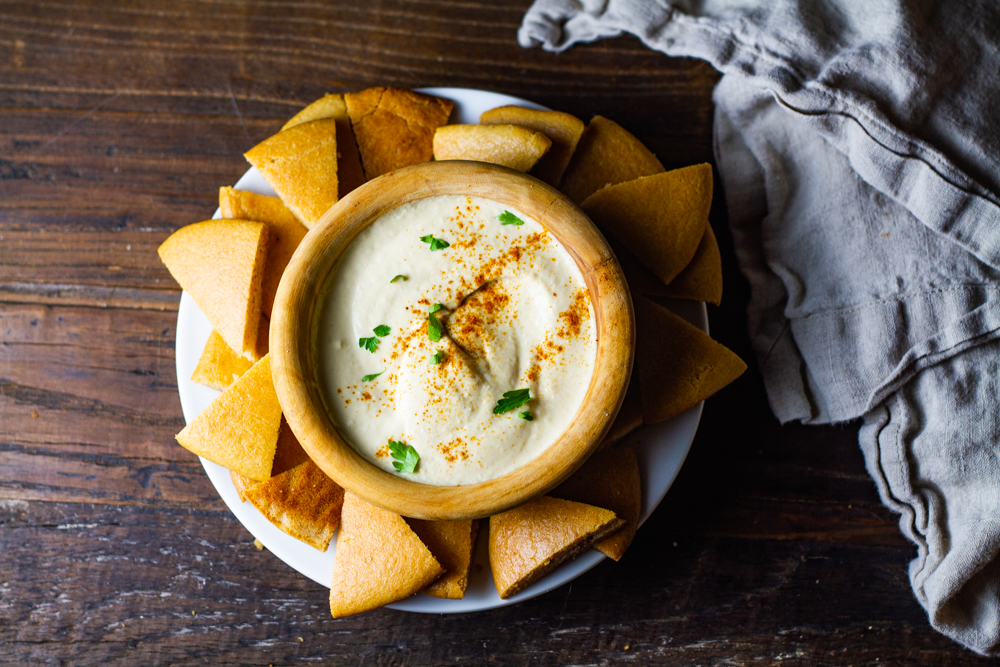
Here’s a genius idea: Use my Sandwich Rounds recipe to create “pita bread.” I learned this trick from Comfy Belly followers on social media, so I had to try it. Turns out the “pita” triangles go great with hummus. They’re both high in protein and the “pita” triangles carry the hummus well.
You can also pack up this combo up for a picnic, camping trip, or just as a snack to grab at a moment’s notice. Yet another option is to create a full on snack plate and add grapes, cut veggies, and maybe some high protein brownies to the mix.
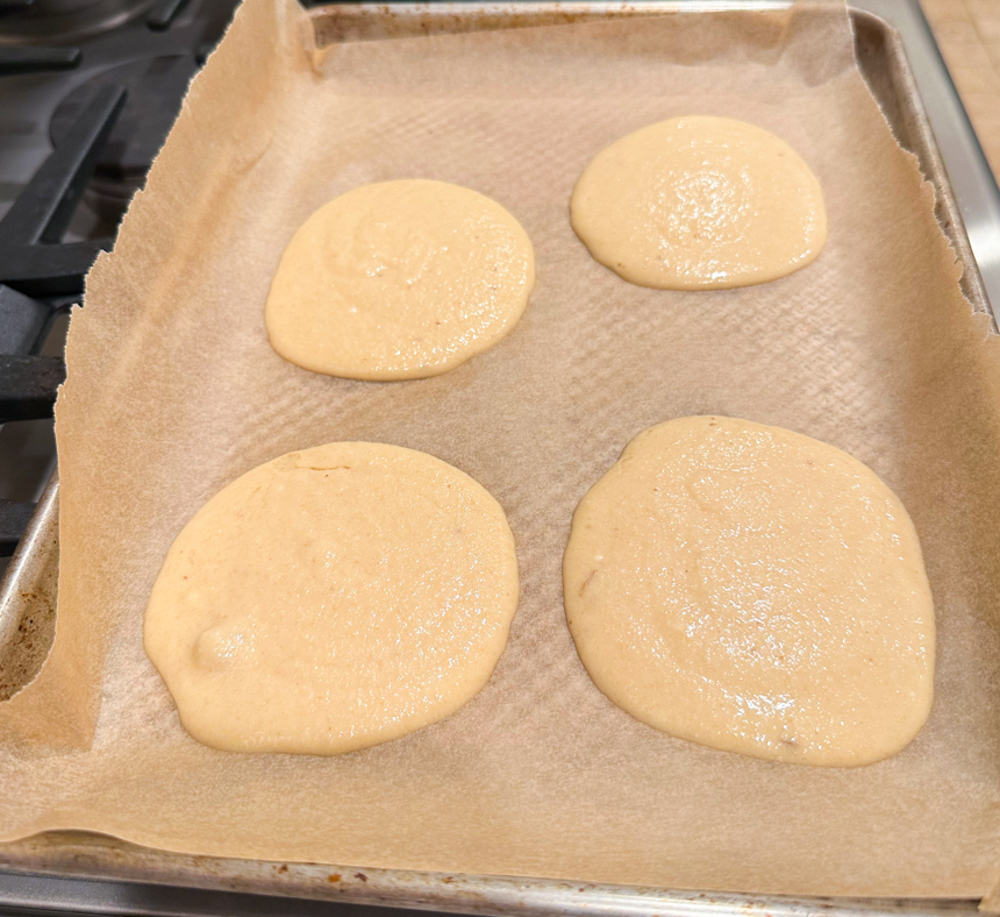
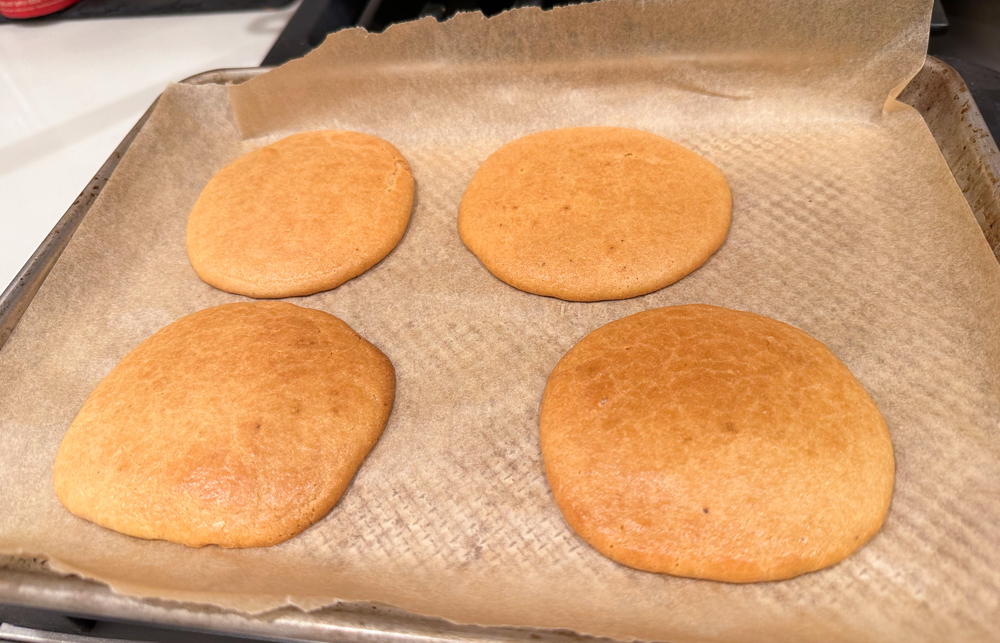
Just follow the recipe for the sandwich rounds below, and then cool and cut the rounds into triangles.
For the hummus, you have a few options: you can use my hummus recipe that calls for soaked cashews (or white beans), or my favorite hummus recipe using garbanzo beans. Or, try my cauliflower hummus recipe in my cookbook, Cooking for the Specific Carbohydrate Diet. The hummus in the photo was sprinkled with paprika and parsley. Enjoy!
Sandwich Rounds {almond flour}
Ingredients
- 2 1/2 cups blanched almond flour
- 1 teaspoon baking soda
- 1 cup yogurt (or coconut milk or other milk)
- 1/4 cup unsalted butter, melted (or ghee, coconut oil, or shortening)
- 3 large eggs
- 2 tablespoons honey or maple syrup optional
- 1 tablespoon toppings such as poppy seeds sesame seeds (optional)
Instructions
- Preheat your oven to 350°F/175°C. Line 2 ore 3 (depending their size) baking sheets with nonstick baking mats, parchment paper, or other nonstick material.
- Place all the ingredients, except any toppings, in a food processor or blender; blend until creamy. Alternatively, you can blend with a mixer or whisk.
- Pour 2 tablespoons of batter into pancake-like circles onto the prepared baking sheets, leaving about 2 inches between each roll. Feel free to make larger rolls by adding another tablespoon or so. If the batter is thick you can spread it around a bit with the back of a spoon.
- Sprinkle with your chosen toppings and bake for 15 minutes, or until the rolls brown slightly on top. If you’re making larger rolls, they’ll take a few more minutes to brown and firm up sufficiently. Don’t be afraid to go a little brown with these—that will make them firmer and add a tasty crunch at the edges.
- Slide a knife or spatula under each roll and remove to a cooling rack. Let cool completely, seal, and store in the refrigerator for a week or so or in the freezer for a few months.
Leave a Reply